

The Trade Entry Checklist: 5 Confirmations Before You Click Buy
A 5-step trade entry checklist that filters impulsive entries. Confirm trend, zone, timeframe alignment, market shift, and risk before every trade.

A trade entry checklist is a fixed set of conditions you verify before entering any trade. If all conditions align, you enter. If even one fails, you skip it. This mechanical approach filters out impulsive entries and keeps your execution consistent, regardless of how the market feels in the moment.
Most traders lose money not because their strategy is broken, but because they enter trades that do not meet their own criteria. The checklist solves that problem by making the entry decision binary: yes or no, based on structure, not emotion.
TL;DR
A 5-step entry checklist filters impulsive trades and forces structural confirmation.
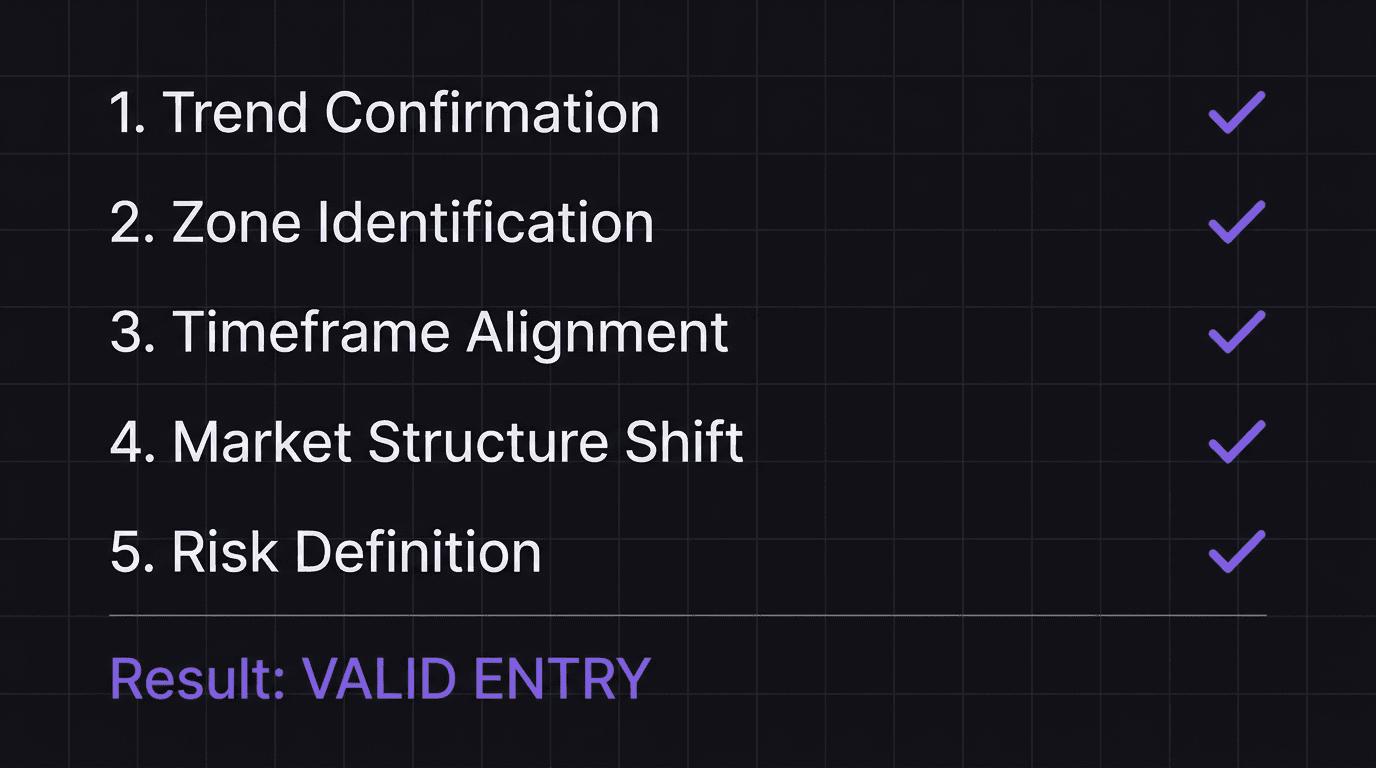
The five confirmations: trend, zone, timeframe alignment, market shift, and risk definition.
Skipping even one step is the most common cause of low-quality entries.
Mechanical execution beats intuition because it removes emotional decision-making at the entry point.
Track checklist adherence in your journal to see whether skipped steps correlate with losses.
Why a Checklist Beats Intuition for Entries
You have probably taken a trade that "felt right" and watched it immediately go against you. That feeling is not analysis. It is emotion dressed up as conviction.
A checklist removes the feeling. It replaces "I think this is going up" with a series of structural questions that either have answers or do not. Is the trend confirmed on the higher timeframe? Is price in a valid zone? Did the lower timeframe shift? Each question has a concrete answer, and that answer does not change based on whether you had a winning or losing morning.
Professional traders in every domain use checklists. Pilots use them before takeoff. Surgeons use them before surgery. The reason is the same: under pressure, the human brain skips steps. A mechanical trading plan with a checklist prevents those skips from costing you money.
The 5 Confirmation Steps
These are the five conditions that must all be true before you enter. The order matters because each step depends on the one before it.
Step 1: Trend Confirmation
Before anything else, identify who controls the market on the higher timeframe. Is market structure printing higher highs and higher lows (bullish) or lower highs and lower lows (bearish)? If structure is unclear or choppy, you have no trend confirmation. No trade.
This step alone eliminates most counter-trend entries that beginners take. If the daily chart is bearish and you are trying to buy on the 15-minute chart, your checklist fails at step one.
Step 2: Zone Identification
Once you know the trend, identify the supply or demand zone where you expect price to react. This is not a random support or resistance line. It is a specific zone where institutional order flow previously caused a reversal or continuation.
The zone must be unmitigated (price has not returned to it since it formed). If price already tested the zone and it held, it is weakened. You want the first touch.
Step 3: Timeframe Alignment
Your higher timeframe gives direction. Your lower timeframe gives entry. These two must align. If the 4-hour chart is bullish and price is at a 4-hour demand zone, drop to the 15-minute or 5-minute chart and look for the entry pattern there.
If the lower timeframe is showing bearish structure while the higher timeframe is bullish, the timeframes are not aligned yet. Wait.
Step 4: Market Structure Shift
On the lower timeframe, you need a structural shift confirming the reversal you expect. This means a higher low forming (for a long entry) or a lower high forming (for a short entry) on the entry timeframe.
Without this shift, you are entering on hope. The shift is your confirmation that the zone held and that the new direction has structural backing.
Step 5: Risk Definition
Before you click buy, define three numbers: your stop loss level, your position size, and your target. Your stop goes below the structural point that invalidates the trade (below the flip zone or below the sweep low). Your position size is calculated from the stop distance and your risk percentage. Your target is the next structural level.
If you cannot define all three, you do not have a trade. You have a guess.
Walkthrough: Full Checklist on EUR/USD
The daily chart shows bullish structure with higher highs and higher lows. Step 1: pass.
Price pulls back to a 4-hour demand zone at 1.0850, which is unmitigated. Step 2: pass.
The 4-hour is bullish. On the 15-minute chart, price enters the zone and begins forming structure. Step 3: pass.
On the 15-minute chart, price forms a higher low at 1.0855 and breaks the last swing high at 1.0868, confirming a market structure shift. Step 4: pass.
Stop below the higher low at 1.0848. Entry at 1.0870. Distance: 22 pips. Target at the next 4-hour supply zone at 1.0960, which is 90 pips away. Account: $10,000. Risk: 1%.
Step 5: pass. All five confirmations met. Risk is $99 (under 1%), and the reward-to-risk is just over 4R. This is a valid entry.
What Happens When You Skip a Step
Every skipped step has a predictable consequence.
Skip the trend check, and you enter counter-trend trades that work occasionally but drain your account over time. Skip the zone check, and you enter at random price levels without institutional backing. Skip timeframe alignment, and your entry gets chopped out by noise on the lower timeframe. Skip the market structure shift, and you enter before confirmation, turning your trade into a coin flip. Skip risk definition, and you size incorrectly or have no stop, which is the fastest way to blow a trading account.
The checklist is not about being right on every trade. It is about ensuring that every trade you take meets your minimum quality standard. Over 50 or 100 trades, that filter is the difference between a growing equity curve and a declining one.
Building Your Own Entry Checklist
The five steps above are a starting framework. Your checklist should reflect your specific strategy and trading rules.
If you trade a different setup, your step 4 might be different. Maybe you wait for a liquidity sweep instead of a market structure shift. Maybe you require a specific candlestick pattern. The point is that you pick your conditions, write them down, and check every single one before entering.
A few practical tips:
Keep it to 5 to 7 items. Fewer lets bad trades through. More creates paralysis.
Write it on paper or keep it on your screen next to your chart. Do not rely on memory.
After each trade, note which checklist items were confirmed and which you skipped. Over time, you will see a pattern between skipped items and losses.
Review the checklist monthly. If your strategy evolves, update the list. But do not change it mid-session based on results.
Your pre-trade checklist is not a suggestion. It is a gate. Treat it like one.
How EdgeFlo Enforces Pre-Entry Rules
Writing a checklist is one thing. Actually following it under pressure is another. EdgeFlo helps by making your rules visible at the moment of execution.
With EdgeFlo's guardrails, you can require pre-trade checklist completion before entering a trade. The guardrail prompts you to confirm each condition. You can override it (the system does not force you to skip a valid trade), but the override is deliberate. You have to choose to break your rules, and that conscious choice alone is enough to stop most impulsive entries.
The trading journal also tracks which entries were taken with full checklist compliance versus which were overrides. After 30 or more trades, that data shows exactly what skipping your checklist costs.
What should be on a trade entry checklist?
How many confirmations do I need before entering a trade?
Can I trade without a checklist?
How long does it take to run through a trade entry checklist?

Turn discipline on.
Every session.
EdgeFlo is the environment serious traders operate inside.
Start 7-Day Trial — $7
Cancel anytime.
No long-term commitment.


Think Different, Trade Different.