

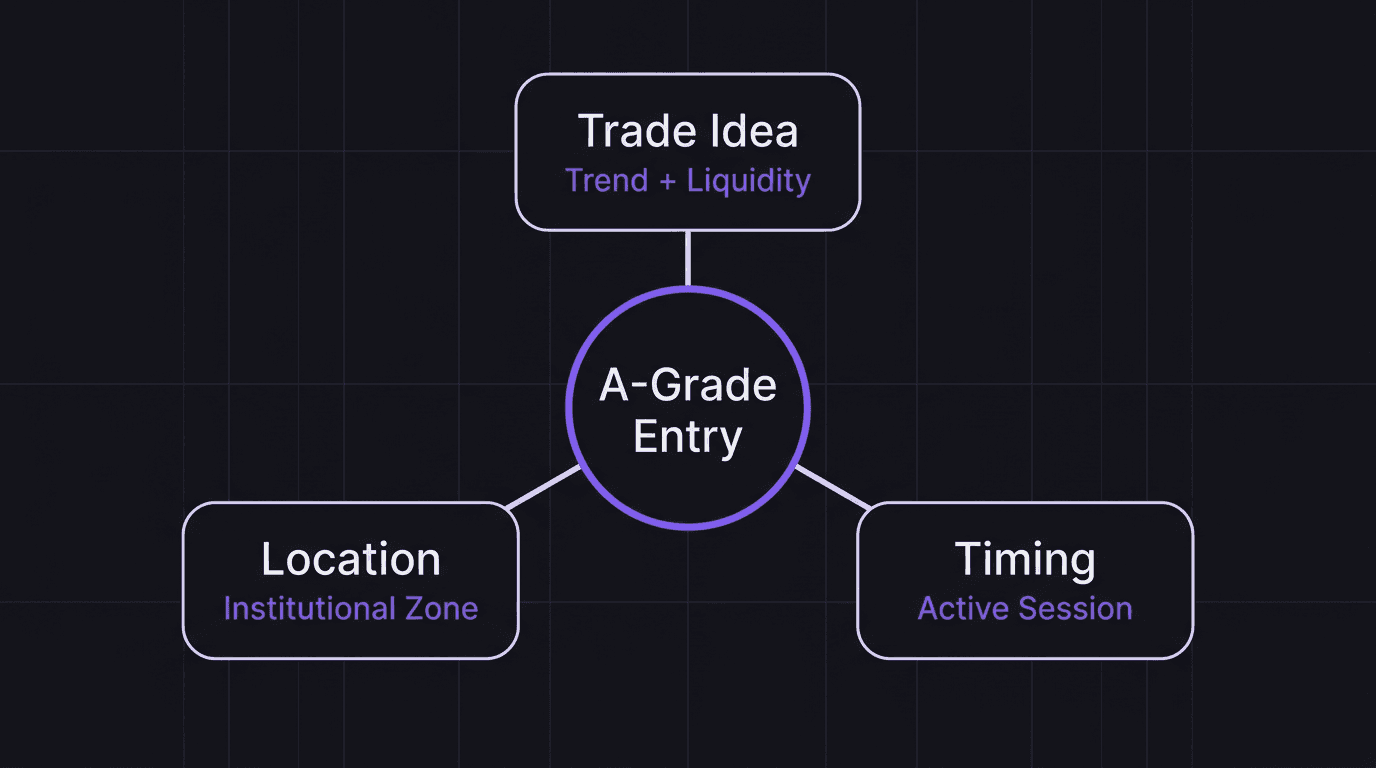
The Holy Trinity of Trading: Liquidity, Location, and Timing
Profitable trades require three factors: the right trade idea (liquidity), the right location (institutional zone), and the right timing (active session). Here is how to align all three.

You can read the trend correctly and still lose. You can identify the perfect zone and still get stopped out. You can trade during the best session and still watch price chop against you.
Each of those scenarios is a trader who has one or two factors right but not all three. Profitable trading is not about mastering one skill. It is about aligning three factors on every trade: the right idea, the right location, and the right timing. When all three converge, profits become a byproduct. When even one is missing, the trade is a gamble.
TL;DR
The holy trinity of trading is idea (trend direction plus liquidity), location (institutional zone), and timing (active session).
Getting two out of three right still loses money. All three must align.
Liquidity provides the fuel for the move. Location tells you where institutions will step in. Timing tells you when they will act.
This framework is especially critical for funded traders who cannot afford to waste trades on low-probability setups.
Checking all three factors before every entry turns impulsive trading into systematic execution.
The Three Factors That Create Profitable Trades
Every profitable trade you have ever taken had these three elements in common, whether you realized it at the time or not:
The right trade idea. You identified the correct trend direction and knew where liquidity was resting. This gave you a thesis: "Price needs to sweep liquidity below this low before continuing higher."
The right location. You entered at an institutional supply or demand zone, not a random level. This is where smart money has a reason to step in, and where your risk can be defined tightly.
The right timing. You entered during the London Open or the London/New York Overlap, when institutional volume is highest and price moves with purpose.
Remove any one of these and the trade breaks down. The right idea at the wrong time produces a stop-out from a pullback. The right location without liquidity produces a weak reaction that fizzles. The right timing at a random level is noise trading with a clock.
Factor 1: The Right Trade Idea
The trade idea starts with market structure. Is price making higher highs and higher lows, or lower highs and lower lows? That answer determines your direction. Trading against the external structure is fighting the current.
Once you have direction, you need to know where liquidity sits. Liquidity tells you what must happen before the next move. If the trend is bullish and there is untapped liquidity below a swing low, then price will likely sweep that low to fuel the next push higher. Your trade idea is: "I will look for longs after price sweeps this liquidity."
Without liquidity awareness, you are trading on hope. You see a bullish trend and enter long at a random point, praying that price continues. With liquidity awareness, you know where the fuel is and where the ignition point will be. The difference is the gap between a guess and a plan.
Walkthrough: Building the Trade Idea on EUR/USD
EUR/USD on the 1-hour chart shows a bullish external structure. The last swing low is at 1.0860, and the most recent swing high is at 1.0940. Price has pulled back to 1.0890. Below 1.0890, there are two internal swing lows at 1.0872 and 1.0870 (near-equal lows). Those equal lows have sell stops and stop losses resting below them.
The trade idea: "Price is bullish. There is untapped liquidity below 1.0870. I expect price to sweep those equal lows, tap the demand zone, and continue higher."
That is the first factor locked. You know what should happen. Now you need to know where and when.
Factor 2: The Right Location
The "where" is the institutional zone. Not every support and resistance level qualifies. You want the supply or demand zone that caused the most recent break of structure (the extreme zone) or a zone with proven institutional interest.
A zone gains weight when it meets these criteria:
It caused a structural break (extreme zone).
It has nearby untapped liquidity.
It has not been retested yet (fresh zone).
It sits in the premium or discount range of the current swing.
The location filter eliminates most of the chart. Out of five or six zones you might draw, typically only one or two meet all the criteria. That is the point. You do not want five possible entries. You want one or two high-probability locations where institutional orders are most likely to sit.
Continuing the EUR/USD Walkthrough
Below the equal lows at 1.0870, there is a demand zone between 1.0855 and 1.0865. This demand zone is the origin of the last bullish break of structure (where price pushed from 1.0860 to 1.0940). It is an extreme zone, fresh (never retested), and it has liquidity sitting just above it (the equal lows at 1.0870 to 1.0872).
This is the location. When price sweeps the equal lows and enters this demand zone, all the criteria are met. This is where you will look for your entry, not at 1.0890 where price currently sits, and not at a random support level.
Factor 3: The Right Timing
You have the idea (bullish, sweep below equal lows). You have the location (extreme demand zone at 1.0855 to 1.0865). Now you wait for the when.
The London Open (3:00 AM to 6:00 AM EST) is when institutional flow first enters the market. Before London, during the Asian session, price typically consolidates with low volume. The Asian session builds the liquidity. London takes it.
The London/New York Overlap (8:00 AM to 11:00 AM EST) is the most volatile window of the day. Both London and New York traders are active, creating the highest trading volume. Sweeps during this window tend to produce the cleanest follow-through moves.
Outside these windows, the same setup has dramatically lower probability. A sweep during the Asian session might produce a small bounce, but it rarely generates enough momentum for a full trend continuation.
Completing the EUR/USD Walkthrough
It is 2:00 AM EST. The Asian session has built a range between 1.0885 and 1.0895. Below that range, the equal lows and demand zone are waiting. At 3:10 AM EST (London Open), price drops sharply, sweeping through the equal lows at 1.0870 and wicking into the demand zone at 1.0858. A V-shaped reaction follows. Price snaps back to 1.0882 within two 5-minute candles. Internal structure breaks at 1.0888 (above the last internal lower high).
Entry at 1.0888. Stop loss below the demand zone at 1.0850 (38 pips). Target at the previous swing high area near 1.0950 (62 pips).
All three factors aligned: bullish idea with liquidity sweep, institutional demand zone, and London Open timing. The result was a clean, directional move with defined risk.
What Happens When One Factor Is Missing
Same EUR/USD setup, but the trader enters at 10:30 PM EST (Asian session) when price first touches 1.0870. The idea is right (bullish, liquidity below equal lows). The location is close (near the demand zone). But the timing is wrong. Price wicks to 1.0868, bounces to 1.0880, then slowly grinds back down to 1.0855 over three hours. The trader's stop at 1.0850 gets hit at 1:00 AM EST. Three hours later, at London Open, price sweeps to 1.0845, V-shapes, and runs to 1.0950. The trade idea was correct. The location was close. But the timing killed it.
That is the cost of two out of three. Close is not good enough when your capital is on the line, especially in funded accounts where drawdown limits leave no room for timing mistakes.
How EdgeFlo Aligns All Three Factors
EdgeFlo does not tell you what to trade. It helps you enforce the conditions under which you trade. The trading windows feature restricts your execution to your chosen session, so you cannot take trades during dead hours. The pre-trade checklist within Edge prompts you to confirm your trade idea, your location, and your timing before execution. And the risk guardrails ensure each trade uses defined risk, so even when all three factors align and the trade still loses (which will happen), the loss stays small. The system works because it forces you to prove all three factors are present before you commit capital.
What are the three factors of a profitable trade?
Why do all three factors need to align?
What is the best time to trade forex?
How does this framework help funded traders?

Turn discipline on.
Every session.
EdgeFlo is the environment serious traders operate inside.
Start 7-Day Trial — $7
Cancel anytime.
No long-term commitment.


Think Different, Trade Different.