

Demand Zone Entry: 3 Confirmations Before You Buy
Three lower-timeframe confirmations prevent premature entries at demand zones: rejection candle, break and close, failure to continue. Full walkthrough.

Price touches your demand zone. Your heart rate spikes. Every second it sits there feels like the last chance to enter before the rocket takes off. So you buy.
Then price keeps dropping.
The zone was valid. The direction was correct. But you entered before the buyers proved they were actually in control. That premature entry is the single most expensive habit in zone-based trading.
Three confirmations on the lower timeframe fix this. They are not complex. They are not indicators. They are pure price action signals that tell you whether the demand zone is holding or failing.
TL;DR
Never enter a demand zone just because price touched it. Price can sweep through and keep going.
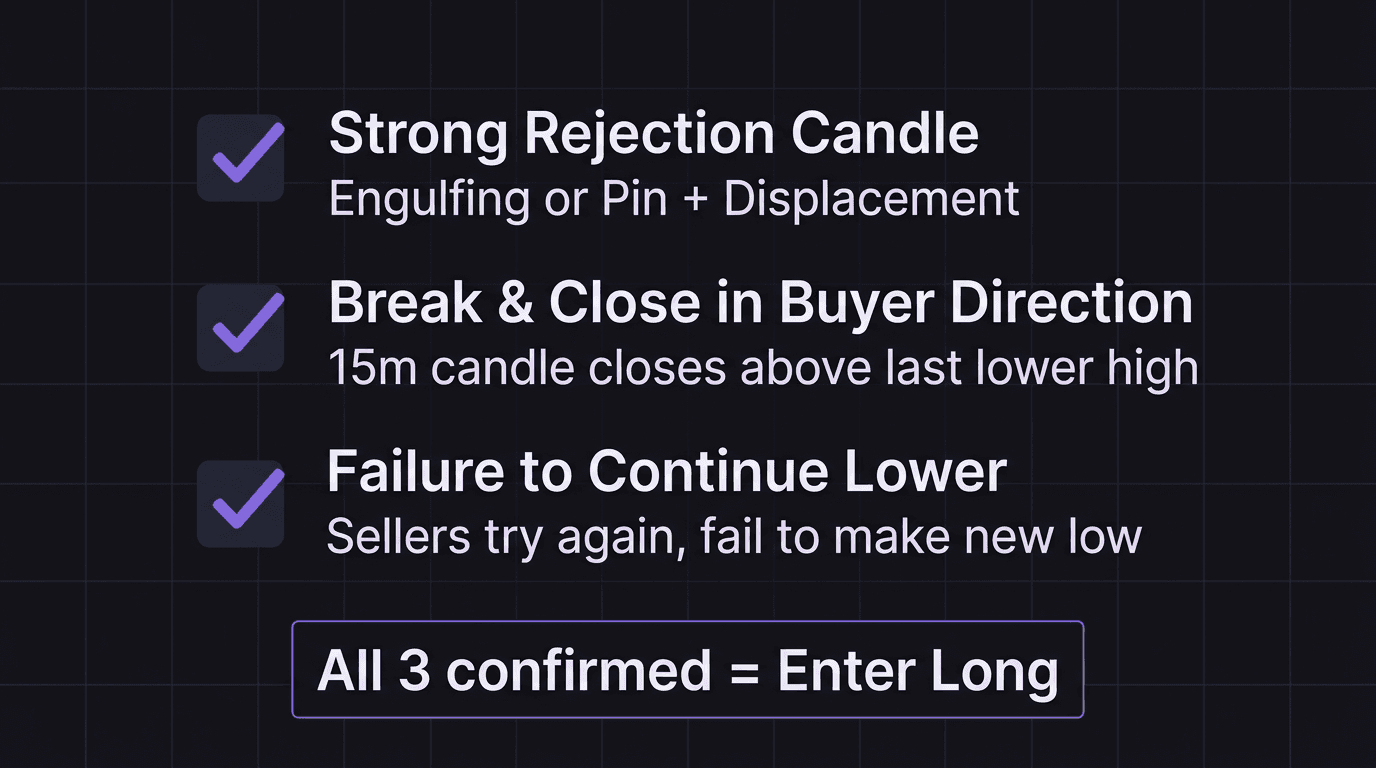
Confirmation 1: Strong rejection candle (engulfing or pin with displacement) shows buyers stepping in hard.
Confirmation 2: Break and close in the bullish direction proves buyers took short-term control.
Confirmation 3: Failure to continue lower signals that selling pressure is exhausted.
Wait for all three on the 15-minute chart before entering. This one habit eliminates most premature entries.
Confirmation 1: Strong Rejection Candle
When price enters your demand zone, the first thing you watch for is how it reacts. You want to see buyers respond aggressively, not gently.
A strong rejection candle takes two forms:
Engulfing candle. A large bullish candle that completely covers the body of the previous bearish candle. The size difference matters. A candle that barely exceeds the previous one is not a strong rejection. You want a candle that dwarfs it, showing that buy orders flooded the market in a single period.
Pin bar with displacement. A candle with a long lower wick that rejected the zone, followed immediately by a large bullish candle. The wick shows the initial rejection. The follow-through candle shows that rejection had real momentum behind it, not just a temporary pause.
If price enters your zone and you see small, indecisive candles, that is not a rejection. That is price lingering. Lingering can turn into a breakdown just as easily as a reversal. No rejection candle, no entry.
Confirmation 2: Break and Close in Buyer Direction
The rejection candle shows that buyers showed up. The break and close proves they took control.
On the 15-minute chart, price inside your demand zone creates a local structure of lower highs and lower lows (the bearish move that brought price to the zone). You need to see that bearish structure break.
Specifically, look for the last lower high on the 15-minute. When a bullish candle closes above that lower high, buyers have officially taken short-term control. The pullback into the zone is over. The reversal has started.
This is the most common confirmation traders skip. They see the rejection candle and jump in immediately. But a rejection candle without a structural break is just a bounce. Bounces fail all the time. A break and close in the bullish direction means buyers have enough strength to change the short-term trend, not just cause a wick.
Confirmation 3: Failure to Continue Lower
After the rejection and the break, price often retests the area one more time. Sellers make one last attempt to push lower. This is where confirmation three lives.
You are watching for price to try pushing down and fail. It might create a small bearish candle that does not close below the rejection candle's low. It might wick down and get immediately bought up. The key is: sellers tried, and they could not make a new low.
This tells you that the supply (selling pressure) has been absorbed. The sellers who wanted out are out. What remains is buy-side demand with no meaningful opposition.
All three confirmations together paint a complete picture: buyers arrived (rejection), buyers won (break and close), and sellers gave up (failure to continue). Only then do you enter.
Walkthrough: Waiting for All Three
GBP/USD, 4-hour timeframe, bullish trend. Your demand zone sits at 1.2680 to 1.2695 in the discount of your swing range. Price starts pulling back from 1.2780.
Hour 1: Price drops to 1.2700. Still above your zone. You do nothing.
Hour 4: Price enters the zone at 1.2690. You switch to the 15-minute chart. Current structure on 15m is bearish: lower highs, lower lows. The last lower high sits at 1.2710.
15m candle at 14:45: A large bearish candle pushes price to 1.2678, wicking below the zone. The next candle is a massive bullish engulfing that closes at 1.2698. Confirmation 1: rejection candle. Check.
15m candle at 15:15: Another bullish candle closes at 1.2715, above the last lower high at 1.2710. Confirmation 2: break and close in bullish direction. Check.
15m candle at 15:30: A bearish candle forms, pushing back to 1.2703. But it cannot close below 1.2698 (the engulfing candle's body). It closes at 1.2705 with a small body. Confirmation 3: failure to continue lower. Check.
Entry at 1.2705. Stop below the rejection candle's wick at 1.2675. Risk: 30 pips. Target at the swing high at 1.2780. Reward: 75 pips. R:R = 2.5:1.
Price rallied to 1.2780 three days later. All three confirmations were present. The entry was clean.
What Would Have Gone Wrong Without Patience
Imagine entering at 1.2690 the moment price touched the zone, without waiting for any confirmation. Your stop is still at 1.2675. Risk is 15 pips, which seems better.
But without confirmation, you are betting that the zone holds. Price wicked to 1.2678, which means you spent 25 minutes watching a 12-pip drawdown with no evidence that buyers were even present. If the zone had failed, price would have blown through 1.2675 and you would be sitting on a loss, wondering why you did not wait.
Waiting for confirmation costs you 15 pips of entry quality. Not waiting costs you the entire trade when the zone fails.
How EdgeFlo Documents Your Entry Confirmations
The three confirmations become second nature with practice. But tracking whether you actually waited for all three (or whether you skipped one in the heat of the moment) requires a system.
EdgeFlo's Edge plan builder lets you write out your entry criteria as a pre-trade checklist. After every trade, the self-reporting feature asks you to confirm which criteria you followed. Over time, the pattern becomes obvious: trades where you checked all three confirmations cluster around positive R. Trades where you skipped one cluster around breakeven or losses.
That feedback loop turns the three confirmations from a concept you read about into a habit you follow automatically.
What are the three demand zone entry confirmations?
Which timeframe should I check for entry confirmation?
Can I enter a demand zone without all three confirmations?
What does failure to continue lower look like?

Turn discipline on.
Every session.
EdgeFlo is the environment serious traders operate inside.
Start 7-Day Trial — $7
Cancel anytime.
No long-term commitment.


Think Different, Trade Different.